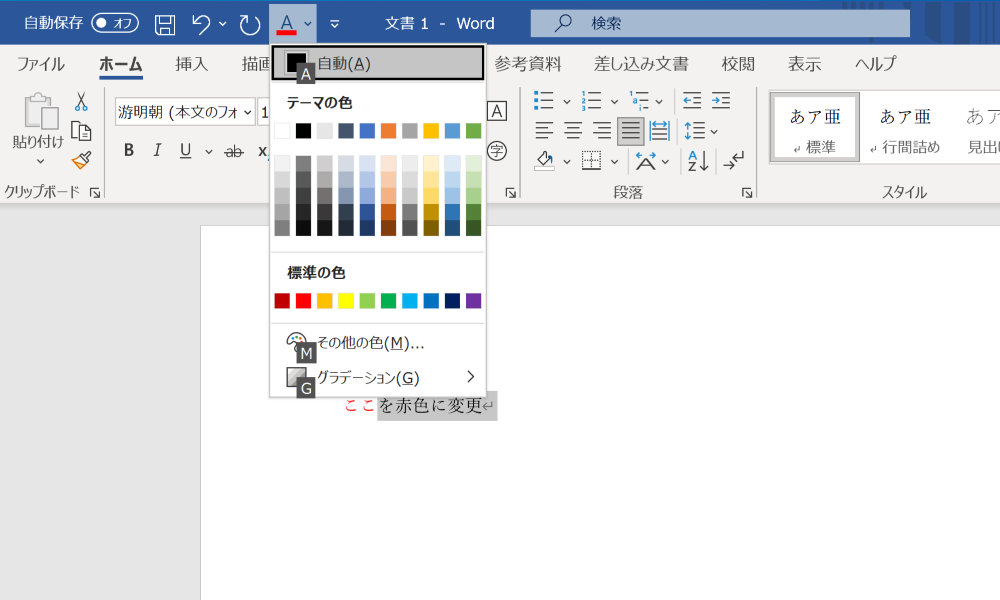
Since I try to avoid using the mouse as much as possible, I used to change the text color in Word by adding the “Text Color” function to the Quick Access Toolbar, as shown in the image below, and displaying the “Text Color Palette” using [Alt] + a number.
Changing text color in Word via Quick Access Toolbar
However, with this method, after pressing the [Alt] key and the corresponding number (in this case, 4 for the fourth item from the left), I had to move the cursor to the desired color, which was a bit cumbersome.
While searching for a simpler way, I discovered that, at least in Word, you can change the text color instantly with a shortcut key by configuring it, so I decided to set it up.
For non-Word files, this method doesn’t seem to exist, and you’d need to create a macro. I’ve explained how to do this for PowerPoint in another blog post, so feel free to check it out if you’re interested.
Word offers a function to assign shortcuts to various features, and here’s how to set one up for changing text to a specific color:
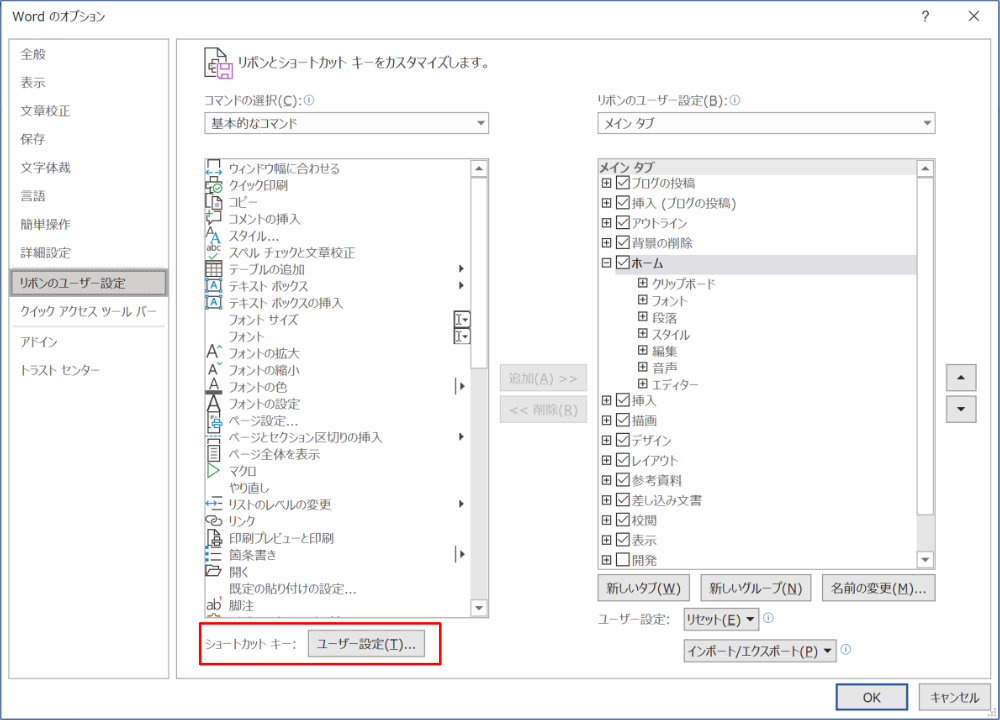
1. Select “Customize Ribbon” from “Options”
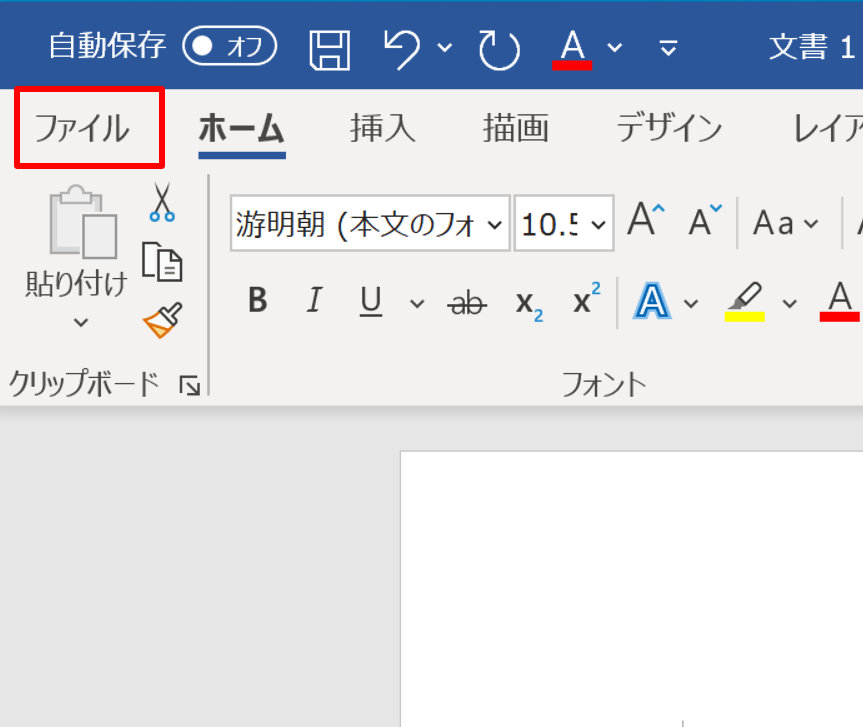
From the Word editing screen, choose “File.”
Word – Editing screen
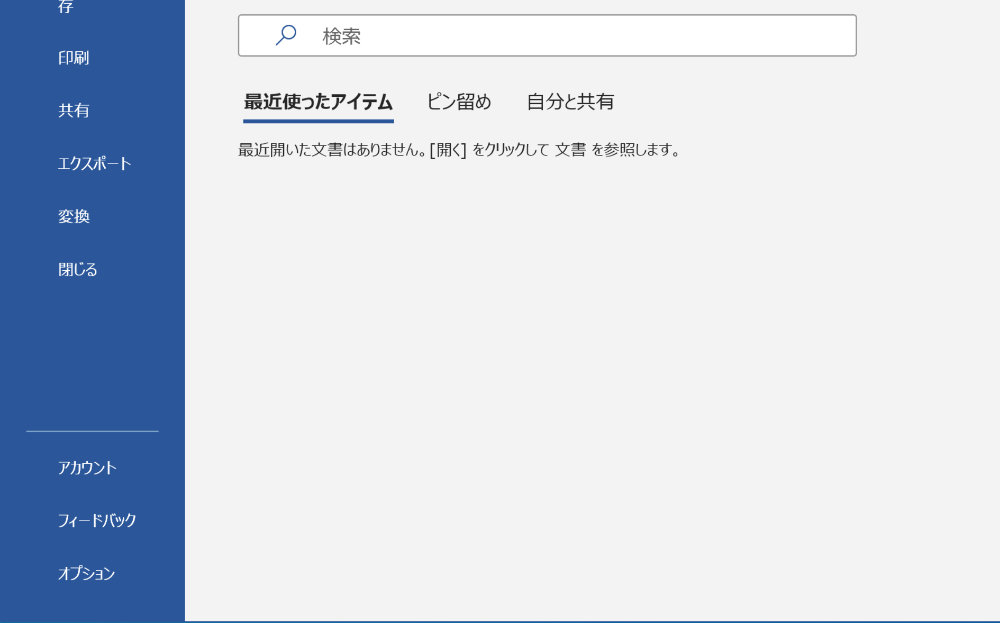
From the file screen, select “Options” at the bottom.
Word – File screen
In the “Word Options” screen that appears, choose “Customize Ribbon” from the menu on the left, then click the “Customize” button for the shortcut keys (highlighted in red).
Word – Options screen
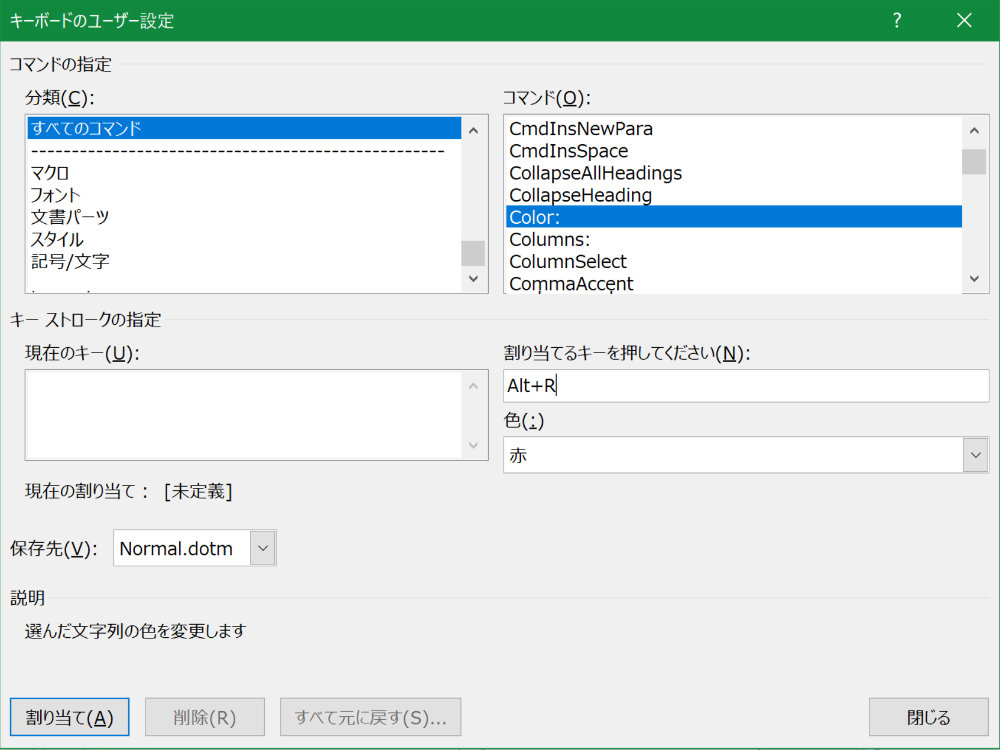
2. Customize the keyboard shortcuts
In the “Customize Keyboard” screen: ・Category: All Commands ・Command: Color: ・Color: Red (or choose your preferred color) Then, focus on the “Press new shortcut key” field and press your desired shortcut (I chose Alt+R).
Word – Customize Keyboard screen
After that, click the “Assign” button to complete the setup.
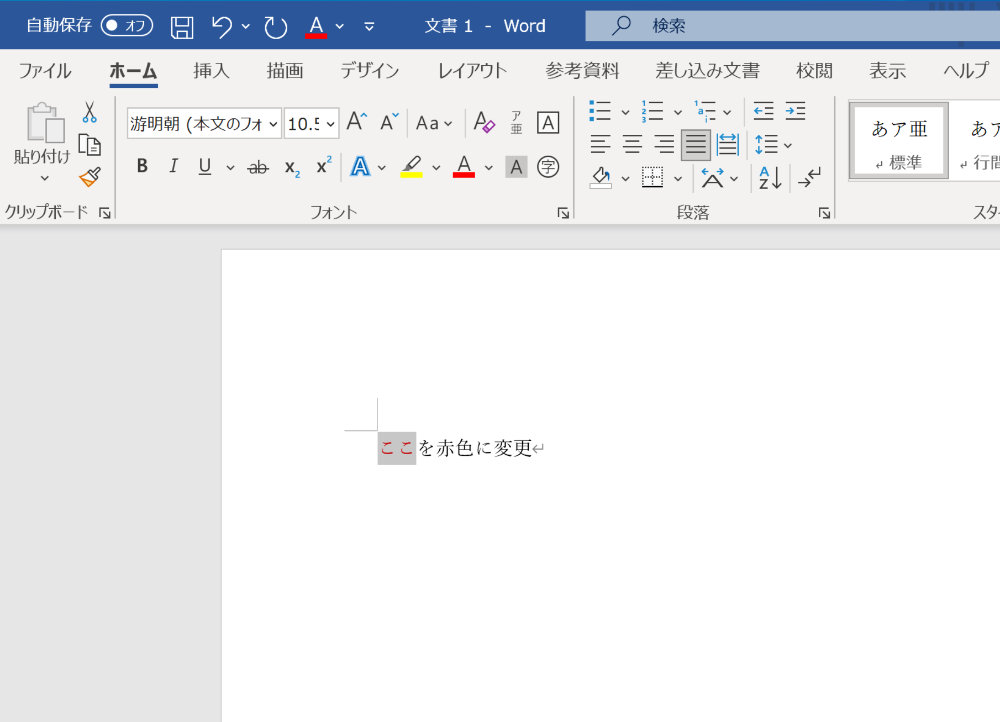
3. Changing the text color
Now, use the shortcut you set up to change the text color of the selected text.
After selecting text with your mouse, press the “Alt+R” key, and the selected text will change to red, as shown below.
Word – Editing screen
For example, during an online meeting, you can quickly change the color of important text while talking to others. This trick is both smart and impressive, so give it a try!
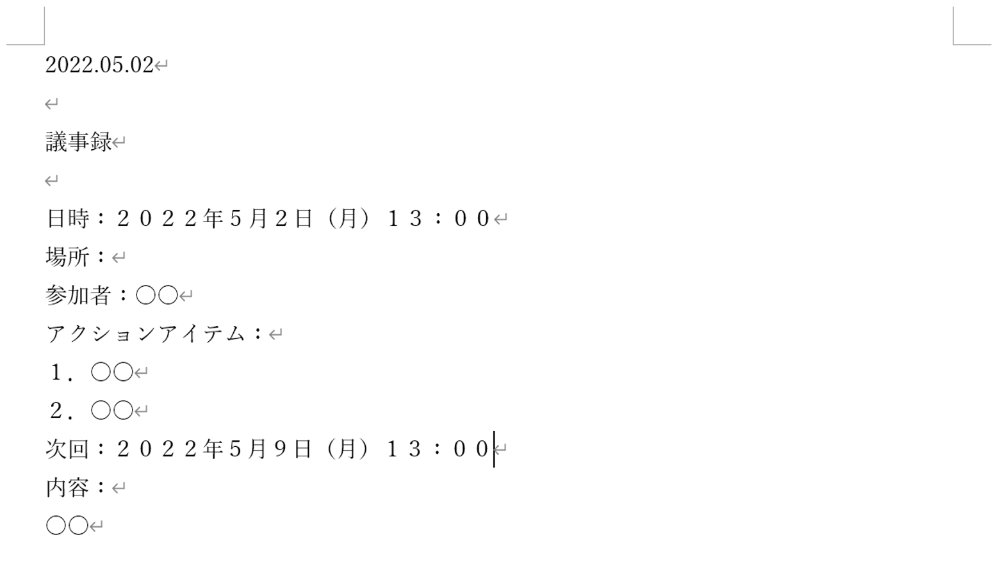
' get charactor from cursor to line end
d_txt = Selection.Text

' check d_txt contents
'MsgBox d_txt

Selection.Sentences(1).Delete

' insert d_txt into d_tbl
d_tbl.Cell(1, 2).Select
Selection.TypeText Text:=d_txt
Option Explicit

Sub editMinuts()

With Selection.Find
    .Text = "2022."
    .MatchByte = True
    .Wrap = wdFindContinue
    .Execute
    Selection.ParagraphFormat.Alignment = wdAlignParagraphRight
End With

With Selection.Find
    .Text = "議事録"
    .Wrap = wdFindContinue
    .Execute
    Selection.ParagraphFormat.Alignment = wdAlignParagraphCenter
End With

With Selection.Find
    .Text = "日時:"
    .Wrap = wdFindContinue
    .Execute
    Selection.Font.Bold = True
End With

With Selection.Find
    .Text = "場所:"
    .Wrap = wdFindContinue
    .Execute
    Selection.Font.Bold = True
End With

With Selection.Find
    .Text = "参加者:"
    .Wrap = wdFindContinue
    .Execute
    Selection.Font.Bold = True
End With

With Selection.Find
    .Text = "アクションアイテム:"
    .Wrap = wdFindContinue
    .Execute
    Selection.Font.Bold = True
End With

With Selection.Find
    .Text = "次回:"
    .Wrap = wdFindContinue
    .Execute
    Selection.Font.Bold = True
End With

Selection.Move wdLine, 1

Selection.InsertBreak Type:=wdPageBreak

With Selection.Find
    .Text = "内容:"
    .Wrap = wdFindContinue
    .Execute
    Selection.Font.Bold = True
End With

End Sub
Sub 色を変える()

   With ActiveWindow.Selection

      If .TextRange.Font.Color.RGB = RGB(0, 0, 0) Then
         .TextRange.Font.Color.RGB = RGB(255, 0, 0)
      ElseIf .TextRange.Font.Color.RGB = RGB(255, 0, 0) Then
         .TextRange.Font.Color.RGB = RGB(0, 0, 255)
      Else
         .TextRange.Font.Color.RGB = RGB(0, 0, 0)
      End If

   End With

End Sub
With文を使っているとはいえ、最初にオブジェクトの宣言などをして、もう少しスッキリしたプログラムにできそうですが、今回でPower Point VBAは2回目だし、これで動いたので、とりあえず良しとしたいと思います。
もしこれからPower Point VBAを勉強しようとしている方の参考になれば幸いです。
Manage Consent
To provide the best experiences, we use technologies like cookies to store and/or access device information. Consenting to these technologies will allow us to process data such as browsing behavior or unique IDs on this site. Not consenting or withdrawing consent, may adversely affect certain features and functions.
Functional
Always active
The technical storage or access is strictly necessary for the legitimate purpose of enabling the use of a specific service explicitly requested by the subscriber or user, or for the sole purpose of carrying out the transmission of a communication over an electronic communications network.
Preferences
The technical storage or access is necessary for the legitimate purpose of storing preferences that are not requested by the subscriber or user.
Statistics
The technical storage or access that is used exclusively for statistical purposes.The technical storage or access that is used exclusively for anonymous statistical purposes. Without a subpoena, voluntary compliance on the part of your Internet Service Provider, or additional records from a third party, information stored or retrieved for this purpose alone cannot usually be used to identify you.
Marketing
The technical storage or access is required to create user profiles to send advertising, or to track the user on a website or across several websites for similar marketing purposes.